Jumat, 31 Desember 2010

Proud Photography Interactive Online Course Review

The Proud photography online interactive course is simply one of the best online photography courses available today. The reason for this statement is that the proud photography course has been designed by professional photographers and trainers keeping in mind the requirements and aspirations of the amateur photographers.

After enrolling for the course, you will be made to go through their extensive and specialized lessons, actively take part in quizzes, competitions and receive useful homework assignments which will enable you to enhance your photography skills as you move through the course. You can also send your photographs to proud photography tutors to receive constructive and helpful critiques which will help you enhance your skills. The best thing about the proud photography online course is that your progresses will be monitored by a personal tutor very closely, which means it is actually an interactive course.

Also after you are enrolled into the course, you do not need to meet any deadlines because you are free to work at your own desired pace this means you won't be slowed down by any other student or will not be pressurized to compete with others who are working at a comparatively faster pace. Be it weekends or weekdays, proud photography works on all days, which implies that you can work according to your own convenience.

You don't require any special and expensive camera or high level of skill to enroll for this online course. You can use your 35mm Camera which uses a film or a simple digital camera for taking photographs because the techniques which you will be taught are important and not the type of camera you are using. These techniques which will be taught to you can also be applied to any type of camera you own.

It does not matters if you are an experienced photographer, amateur or just a beginner. You can enroll for the proud photography online interactive course for excellent results.

Kamis, 30 Desember 2010

A Quick Guide to Photographing the Canadian Rockies


Image : http://www.flickr.com


Goodbye to Alberta...

Wow, what a slice. I never thought I'd hear myself saying it, but we are indeed leaving Alberta. I've lived here just over 13 years, and in that time fell deeply in love with the Rockies. My wife and I decided a few months ago that it was time to move on; time for a change. Neither of us have ever sat too long in one place, and this has been the longest for both of us; a testament to how good Calgary has been.

It was here I started using a 35mm camera seriously, enough so that it's now a part-time career. Weddings and portraits make up the bulk of my work, but my first love is shooting landscapes in Banff National Park. This sparked the idea of conducting photo tours for visitors to the area, and I took an interpreter's course with the Mountain Parks Heritage Interpretation Association.

When conducting photo tours, I fell into a rhythm of locations I would bring my clients. I'll share it for the benefit of you photographers looking for a day or two of planned shooting. It is mostly based on a book published by a friend of mine, Darwin Wiggett, called "How to Photograph the Canadian Rockies". We struck up our friendship in 2003, when he asked for some preliminary editing help with the content, as well as some field testing of his chapter on Kananaskis Country.

Photo Tour Destinations

From Calgary, I'd head west, then south down Hwy #40 and depending on the wind, would shoot sunrise at any of the following locations: Lorrette Ponds, Wedge Pond, or Mount Kidd reflecting pools. The last one is a little more sheltered, as the wind will easily ruin the classic mountain reflection shot in the other two. Another favourite location is a little-known place called Meadow Lake, which reflects Mount Yamnuska quite nicely.

To get there from the Trans Canada Highway, head north on Highway 1X, which is at the west end of Morley Flats. Turn right at the "T" intersection, and a little over a kilometer east is the trailhead parking lot on the left. Walk along the service road to the west, and you'll see a path off to the south about half a kilometer from the parking lot. The trail itself is a short 10-minute walk, which is well-worn, but there may be a few fallen trees to step over. It then opens up to a beautiful meadow just before you see the lake, suggesting the reason for it's name. The location is at N51 06.965, W115 05.659.

After sunrise, I'd then head to Banff townsite and take the gondola ride up Sulfur Mountain, a popular destination for tourists. The view at the top is outstanding, as it overlooks the Bow Valley. Look for Two Jack Lake (it's another prime spot for sunrise, offering an alternate view of Mount Rundle from the usual Vermillion Lakes), and Lake Minnewanka, a popular scuba diving destination. Back down from Sulfur Mountain, I'd then go around the Minnewanka loop, where more times than not we'd run across mountain goats. Following that, head towards Lake Louise via 1A along the Bow Valley Parkway. There are many places to stop for pictures, most notably being the Castle Mountain lookout, and Morants' Curve - especially when there's a train about to go by. Well worth the stop.

Once at Lake Louise, check out the lake itself, then head up to Morraine Lake, a beautiful destination. Rent a canoe for an hour, but be careful you only take minimal gear in a splash-proof camera bag. Drive back down to Lake Louise and head up Hwy 93. There are numerous places for pictures, such as Hector Lake, Waterfoul Lakes, Mosquito Creek, Tangle Falls, Athabaska Falls, etc... all the way up to Jasper.

To take everything in I've described, you really need two days minimum - I've highlighted the main ones I've used for photo tours that usually just last one day. My usual sunset location is Vermillion Lakes, just outside Banff townsite. The view of Mount Rundle is classic, and you will no doubt run into other photographers, as it is a Rocky Mountain icon.

Cheerio...

So, that's pretty well it. The other thing I take away with me is the many waterfall pictures shot all over western Canada, and the regret of not getting out more than I did. One can't find enough adjectives to describe this area with all its grandeur and majesty. I will miss it dearly, and will jump at any chance to come back for a visit. If you live here, you're very fortunate. Drive/hike/camp as much as you can, and take your camera with you. If you don't live in this area, then it is a must-see destination. Leave yourself as much time as possible - and if I may recommend - hire a local interpreter for the time you're out taking pictures; they will add a dimension to your experience you wouldn't have otherwise had. You can find one here.

A big "thank you" goes out to all my clients, and I now look forward to new people, geography, and opportunities in rural Ontario.

Cheers,

Jim

Rabu, 29 Desember 2010

Samsung TAB review

 Samsung released Samsung galaxy tab recently. This galaxy tab is beautiful and feature rich product from Samsung. This Galaxy tabs makes apple ipad users envious. This Galaxy tab has android OS and the price of this galaxy tab in India is approximately 50000Rs.

Pros and Cons of Samsung Galaxy Tab
Pros:

  • 7 Inch Screen
  • 2 boasting camera.
  • Flash compatibility
  • Convenient size.
Cons:
  • The Android OS and its Android appplications are not optimized for larger screen.
  • The price is not pocket friendly

Galaxy tab features and Specifications:


  • 7-inch touchscreen capacitive touchscreen
  • 1GHz Hummingbird Application processor supporting 3D graphics
  • Google Android v2.2 Foryo
  • Front and rear-facing cameras for video chat while on-the-go
  • Weighs only 13 ounces and is 12 millimeters thin.
  • Galaxy Tab keep users connected with Samsung’s Social Hub application
  • 4,000 mAh Battery
  • HSUPA 5.76/HSDPA 7.2 Mbps
  • Quad Band GSM/EDGE/GPRS
  • 7” inch (1024×600) WSVGA 169PPi TFT Touchscreen
  • 16/32 GB Internal Memory
  • Micro SD up to 32GB
  • Wi-Fi 802.11 b/g/n
  • Bluetooth v3.0
  • A-GPS with Google Navigation (Beta)
  • Full HD Video Player (1080p)
  • 3.5mm Earphone Jack
  • Battery: 4000 mAh
  • 7 Hours Movies Play
  • Dimensions: 190.09×120.45×11.98mm
  • Weight: 380gm
Optional features of Galaxy tab are Keyboard Dock, Desktop Dock, Car/GPS Dock.

Selasa, 28 Desember 2010

Beginners Guide to Digital SLR Cameras

There comes a time in everyone's life when he or she wonders if there is more to photography than a palm-sized block of aluminum that is the point and shoot camera stowed away in their pocket.

The compact point and shoot camera has come so far in the last ten years that it's tempting to write off Digital SLR's as somewhat irrelevant to a lot of people's lives, not offering enough utility to offset their quite bulky size and hefty price tag. Folks get by now with just a Mobile phone camera, they don't even have a point and shoot!

As soon as I bought my first compact camera, a few years ago, the Canon Ixus, I was in this boat. I asked myself "what more could one possibly need?" I told myself I would never need a Digital SLR. For many months I even used a Phone camera with the Sony image stabiliser and at 3.2 Mega pixels this was a great little camera that almost fulfilled my needs.

How could I possibly need a Digital SLR? Well, some time ago, I owned a Canon 35mm SLR, I used it for some years in fact, I believe the model number was A1. The shots I took with this were very good, the drawback was obviously the film developement, or lack of the facility to perform this myself, after all, at this time you had to set up your own Dark Room, (if you had the space) which I didn't. I was very interested in improving the pictures I took in a sort of artistic way, (not in a technical way). The point and shoot cameras at 10 Mega pixels are adequate even the most tech' people and produce excellent graphic results if you know how to operate the relevant software.

No, what I wanted was to improve the atmospheric quality of the Pic's.... After a great deal of umming and arring I dove in and bought my first Digital SLR, a Canon 1000D, not the most expensive by any means, but hey, I was just dipping my toe in the water. How things have changed. Digital Slr's need no such requirements as a dark room and all the gubbins that you need to print the pictures you want. The requirements are.


A computer.

A quality printer

A reasonable knowledge of the software provided with the camera.
If you have your own software that you are pretty familiar with you can even use this.

My pictures have improved a lot, due mainly to the manual settings I can achieve with the camera and the functions available in the software, if you can't achieve the shots you want with the camera, you can certainly get what you need with the software. When you take a good picture and learn how to use the software the limits are endless.

The conclusion then: If you are interested in improving the pic's you take and preserving them for posterity, get yourself a Digital SLR now. Don't pay the earth, we all have fads and if this turns out to be one you won't have spent the earth. If you aren't interested in improving your photo's, stick with your point and shoot.

Senin, 27 Desember 2010

Essential Information About Camera Lenses

As we know, there is no one camera that can perform in all type of shooting situation, same goes to camera lenses. Each camera lens has its own individuality and component with individual benefits and disadvantage over others. By understanding more about how camera lenses separate over each other, we get to know how to apply the right camera lens according the condition and demands.

Choosing canon lenses for your DSLR can be really pleasurable and inspiring. Canon offers a vast collection of lenses for both the amateur and the specialized. Buying a lens is a significant process and method, as it would be a new implement to your photographic kit, however you will want to make sure your purchase is an intelligent one.

The majority 35mm SLR cameras in market come collectively with a 'standard lens'. Standard lens now refer to a lens with focal length of 50mm and this is the format that a huge amount of people regards roughly as what we usually see with our own eye. As such, 50mm is still an extremely well liked lens among all photographers. Usually 50mm camera lens has a highest aperture of f1.8. There are also faster lens with greatest aperture of f1.4 and even f1.2. These fast lenses establish to carry superior feature and quality.

Other obsession to make note on is all SLR/DSLR cameras have compatible lenses. Shifting of lenses can be done without any problems and is differentiated by the mount of the camera. The most fashionable mount for most cameras used nowadays is the bayonet mount. In sort to change lens in a bayonet mount, for taking out lens, push on a switch nearby to the mount then just turn the lens 45 degree in a clockwise way, for inserting another lens, simply align the lens accordingly to the marking on the camera body and camera lens and turn the lens in 45 degree anti clockwise.

The talent of varying lenses in SLR/DSLR is properly one of the major reasons behind the vision and enormous usability in photography compare to other cameras. Therefore, a camera with a usual lens would not be capable to let you in using the camera to its fullest. Commonly, most photographers will think getting or have to get another two lenses in the class of wide-angle lens and telephoto lens.

Canon lenses had a focus ring, which lets the users focus the lens yourself, and a control that lets the users wish auto focus or manual focus as a focus mode. Latest canon lenses are Image-stabilized lenses that allow the photographer to turn the stabilizer on or off as well as pick different modes of stabilization for different modes of photography, one for normal use and one for panning. Equally, the lenses also have a focus distance switch that lets the photographer limit the focal distance, which can help reduce auto focus time.

Canon lenses are the EF lenses, which stands for "electro-focus." they were introduced in 1987 on canon films lenses. They are well matched with all of the current versions of canon digital SRLs. Other types of canon lenses are EF-S. EF-S lenses work on only a few Canon cameras. The S stands for "short-back focus" and it means that part of the lens is closer to the sensor. Full-frame SLRs such as the 5D do not work with EF-S style lenses, because the mount is slightly different.

L-series lenses are Canon's professional series of lenses. The lenses focus very speedily and often feature high aperture settings, usually down to f2.8, so they work well in low light. Canon introduces the L-series lenses in white instead of black, as they say that this reduces heat buildup when lenses used in sunlight. L-series lenses made only with an EF mount, not an EF-S mount.


However, if you are looking to buy Canon lenses you should buy it from Microglobe. Serving for years, they have turn out to be well known for the best price, best quality and the best service. Really, they will give you all the professional help so that you can choose the best product for you.

Minggu, 26 Desember 2010

Sony DSLR Cameras - Making a Name for Itself Amongst the Digital SLR Camera World

Beginning in 2005 Sony and Konica Minolta joined together to create their first top performing Digital SLR Camera. At the same time they introduced a line of lenses and accessories that were made specifically for their DSLR's. The Alpha Series was the name of Sony's new digital SLR Camera. This incorporated a sleeker design while using some of Dynax's renowned features, and a powerful BIONZ™ image processor that delivered high-speed responses and richer colors.

Sony's first digital SLR camera incorporated the Dynax (Konica Minolta mount system) along with Sony's most advanced imaging technology. They added their SteadyShot™ Inside, which was highly recognized with their camcorders already. The Alpha100 featured a 10-mega-pixel resolution and powerful BIONZ™ processing engine for high quality processing that reduced unwanted image noise without degrading resolution or color integrity. The Alpha100 also allowed continuous shooting at 3 frames per second in any file format.

Today Sony has introduced many innovative features with the advancement of their Alphaseries. In particular, designed for the first-time DSLR buyers, Sony came out with cameras focused on a more compact, easier to use, and lighter form while still offering performance and versatility. They also offered built-in assistance with an on-screen Help Guide and Graphics Display.

Current top of the line Sony DSLR cameras have upwards of 25 megapixel resolutions. They've raised the bar in a number of features. Not only do they offer the highest image resolution (25 megapixels), they are the first DSLR to incorporate a 35mm full frame image sensor and the worlds first body-integrated full-size SteadyShot™ Inside image stabilization technology. The Sony Alpha A900 24.6MP Digital SLR Camera features Dual BIONZ™ image processors that allow shooting of up to 5 frames per second with super high quality images.

Sony still hasn't truly broken that barrier as one of the serious camera makers due to its large popularity with their other consumer electronics, but its steadily gaining recognition as one of today's top innovators in the line of Digital SLRs. There's plenty of information online as well as at your local electronics store. You can also check out Sony DSLR Camera for the latest news and information.

Sabtu, 25 Desember 2010

Basic Digital Camera Accessories - Filters Made For Digital Cameras

As any one who owns a digital single lens reflex camera will attest lenses can be quite an investment. Lenses that are optimized for digital project an image onto the camera sensor with high contrast, good color and sharp focus. As photographers we really do get a lot for our money when we purchase a lens. So why do we then install a regular old filter instead of one made to match the lenses optical quality?

I mentioned digitally optimized lenses before, but just what does that mean? While these lenses have several features that make them especially well suited to digital photography one of the main benefits lies in the coatings applied to the glass of the lens. Standard lenses have coating applied to almost every internal and external surface yet they tend to only have an anti-reflective coating on the exterior surface of the front element only. Digital lenses have the anti-reflective coating applied to all surfaces of the glass and this is a key component.

The image sensors used inside digital cameras is highly polished and reflective. This isn't a design flaw, it's the only way they can be made in order to achieve sharp and focused images. Unfortunately it's the very reflectivity of the sensor that causes imaging problems.

As light from our subject passes through the camera lens it focuses on the image sensor. But because the sensor is so reflective some of that light bounces back up through the lens. Older lenses or those not digitally optimized lack the anti-reflective coatings on the back sides of the glass elements. The light that has bounced off of the image sensor strikes these uncoated elements and reflects once again back down to the image sensor. This twice reflected light is now out of focus and causes ghosting and loss of contrast in our image.

We can see that if the lens is made with anti-reflective coatings on the backsides of the elements that we can eliminate a significant source of image ruining stray light. The same principle applies to lens filters. It's difficult to find a filter without coatings; all of them in fact are coated in one way or another. However like the lenses just discussed standard filters lack the coatings on the backside of their glass.

Filters optimized for digital cameras have anti-reflective coatings on the back side of the glass element. Our digital lenses do a great job of not bouncing back reflected light to our camera's sensor, filters made for digital complete the job and allow the camera to capture the very best image.

Nokia C7 Specifications

As I mentioned detailed review on Nokia C7 in earlier post, I am posting the specifications of Nokia C7.

Specifications of Nokia C7


GENERAL:
2G Network:GSM 850 / 900 / 1800 / 1900
3G Network: HSDPA 850 / 900 / 1700 / 1900 / 2100

SIZE:
Dimensions:117.3 x 56.8 x 10.5 mm, 64 cc
Weight:130 g
DISPLAY:
Type: AMOLED capacitive touchscreen, 16M colors
          Size 360 x 640 pixels, 3.5 inches
    Proximity sensor for auto turn-off
          Multi-touch input method
         Accelerometer sensor for UI auto-rotate
          Scratch resistant Gorilla glass display
SOUND:
Alert types:Vibration; MP3, WAV ringtones
Speakerphone: Yes, 3.5 mm audio jack


MEMORY:
Phonebook:Practically unlimited entries and fields, Photocall
Call records:Detailed, max 30 days
Internal:8 GB storage, 256 MB RAM, 1 GB ROM
Card slot: microSD, up to 32GB, buy memory
DATA:
GPRS:Class 32
EDGE:Class 32
3G:HSDPA, 10.2 Mbps; HSUPA, 2 Mbps
WLAN:Wi-Fi 802.11 b/g/n
Bluetooth:Yes, v3.0 with A2DP
Infrared port:No
USB:Yes, microUSB v2.0, USB On-the-go support
CAMERA:
Primary:8 MP, 3264x2448 pixels, fixed focus, dual-LED flash, check quality.
Features of Camera: Geo-tagging, face detection
Video:Yes, 720p@25fps, video stabilization
Secondary:Yes, VGA
FEATURES:
OS:Symbian 3 OS
CPU:ARM 11 680 MHz processor, 3D Graphics HW accelerator
Messaging:SMS, MMS, Email, Push Email, IM
Browser:WAP 2.0/xHTML, HTML, RSS feeds
Radio:Stereo FM radio, FM transmitter
Games:Yes + downloadable
Colors:Charcoal black, Frosty metal, Mahogany brown
GPS:Yes, with A-GPS support; Ovi Maps 3.0
Java:Yes, MIDP 2.1
Other features:
Web TV
TV-out
Digital compass
Active noise cancellation with dedicated mic
MP3/WMA/WAV/eAAC+ player
 DivX/XviD/MP4/H.264/H.263/WMV player
 Quickoffice document viewer (Word, Excel, PowerPoint, PDF)
 Adobe Reader
 Flash Lite 4.0
 Voice memo/dial/command
 T9
BATTERY:
Standard battery, Li-Ion 1200 mAh (BL-5K)
Stand-by Up to 552 h (2G) / Up to 648 h (3G)
Talk time Up to 9 h 30 min (2G) / Up to 5 h (3G)
Music play Up to 54 h

Nokia C7-00 Price Specification Review

Nokia C7  in one word it is  a slimmer version of Nokia N8. Most of the features which are available in Nokia N8 are available in Nokia C7. Nokia C7 is a smart phone at a decent price tag.  C7 is new entry to Nokia C series mobiles. C7 features full touch glass display, Integrated social network applications, apps at Ovi store, 8MP camera and HD support. This C7 comes with blazing fast penta-band 3G, 680Mhz Processor with 256MB RAM.
Nokia C7


Features of Nokia C7:
  •     Sleek design constructed from polished stainless steel and glass.
  •     Videos and images look sharp on the vivid 3.5" high-resolution display.
  •     Three home screens you can personalise with contacts, apps and more.
  •     Use finger gestures – pinch to zoom, flick to scroll and tap to select.
  •     View all running apps and tap the screen to easily switch between them.
  •     Capture high-quality photos and HD video using the 8 megapixel camera.
  •     Watch National Geographic, CNN, BBC and many more channels with Web TV.
  •     Listen to music on your car stereo with the built-in FM transmitter.
  •     Flip through album art and make playlists of your favourite songs.
  •     Play music out loud on the powerful Nokia Mini Speaker MD-9.
  •     Enjoy over 250 new features from the Symbianˆ3 operating system.
  •     Customise your phone in more ways than ever.
  •     Easier, more intuitive touch-screen controls.
  •     Run multiple apps without sacrificing battery life.
  •     Develop your own apps with ease.
  •     GPS and AGPS for navigation.
  •     Integrated social networks: Get live updates from Facebook and Twitter directly on the home screen.
  • 8 mega pixel fixed focus rear camera with dual LED flash which can even recor videos at 720p.
PC Suite for Nokia C7: Free download of Nokia C7 PC suite download details are given in Nokia PC suite download post.

Latest Price of Nokia C7 in India: As on September 1st 2011, Nokia C7 price in India is 17,000Rs. before buying the phone have a little research on price as you might get discounted prices on some occasions.

 Pros and Cons of Nokia C7:
Pros of C7:


  • Sturdy, attractive steel case
  • Great battery life
  • Responsive capacitive touchscreen
  • Decent camera
  • Blazing fast penta band 3G support.


Cons of C7:

  • Software isn't as easy to use as competing offerings
  • Weak calendar and email services
  • Terrible on-screen keyboard
  • Lame widgets
Specifications of Nokia C7:


  • Music and Video player
  • Stereo speakers
  • 3.5-mm headphone jack
  • Bluetooth device
  • Zoom function
  • Dual-LED flash
  • GPRS/WAP/JAV
  • Web browser
  • 3.5-inches touch screen display
  • 8 megapixel rear camera
  • 680Mhz Processor with 256MB RAM.
For detailed specifications of Nokia C7 Visit Specifications of Nokia C7 for detailed specifications.

Jumat, 24 Desember 2010

Taking Photographs of a Sports Event with a Digital Camera

The sporting world is incredibly popular all across the world these days because sports are an outlet for many people when it comes to de-stressing and enjoying themselves after a long day at work or at school. Professional, and even local league sporting events sellout every day of the week across all of the major sports (football, cricket, rugby and athletics). A popular profession within the sporting world is that of sports photography. Sports photographers are needed for individual athletes, teams, sports camps, events and games.

Sports photographers these days use a digital camera to take their photos so they can take zoomed in shots of the game without having to be in the middle of the action.

Items needed for sports photography jobs include the following:

* Main camera and backup (DSLR and DSLR)

* 70-200, 70-300 or 100-400 zoom lens

* 1.5 and/or 2x tele-converter

* 300 or 400mm telephoto lens

* 24-70 or 24-105 zoom for wide-angle shots and team photos

* Shoe mount strobe for indoor events such as swimming/diving

* Superclamp

* Lens cleaning kit

* Extra batteries

* Large memory cards that last entire game

* Camera raincoat for shooting in bad weather

* Camera bag

Additional items needed for sports photography jobs include the following:

* Extreme wide angle zoom 12-24

* Underwater camera

* Remote camera control

* Camera stand or clamp

* Extra flash units and wireless triggers

* Sports camera strap

* Camera belt pack

Digital cameras are all the rage these days, especially in the sporting world, because of the excellent and clear pictures they take. For instance, digital cameras can take pictures of moving athletes running up and down the field without creating a glare or weird image. These cameras can also take extraordinary pictures of sporting events in the rain, in the snow, in high wind and in other extreme conditions without them coming back looking awful. After some extensive research, we have come up with a list of the top ten most popular digital cameras for sports photography, most of them come recommended by sports photographers who have been in the business for ten or more years. The list includes the following digital cameras:

* Canon 5D

* Nikon D700

* Canon 5D Mark II

* Nikon D3

* Canon 40D

* Nikon D300

* Canon 50D

* Canon 1D Mark III

* Nikon D200

* Canon EOS Rebel T1i

There is much more to sports photography than just turning up at a game with a camera. It takes a lot of practice and knowhow to become a sports photographer these days, especially when it comes to knowing what the best pictures will be to sell to newspapers and online publications across the world. It just is not about taking pictures and emailing them. The lighting has to be setup correctly and the shutter speed needs to be perfect.

Kamis, 23 Desember 2010

Nikon D3100

Nikon's D3100 has now been officially announced and it looks like a real winner, an excellent entry-level dSLR in all respects. As a significant upgrade from the maligned D3000, it adds 1080p video recording, live view and a new and improved 14.2 megapixel sensor into the mix. These upgrades make it the most feature-laden of the current entry-level dSLRs and the one to beat moving forward. The

Canon Digital Camera EOS Vs ELPH Models Review

The brand "Canon" has been a synonym for digital camera for the past decades or so. All cameras that Canon produces manufactured can be classified into one of these 3 production lines; the ELPH models, the EOS models and the infamous PowerShot models. Canon has designed over sixty different models for each line.

EOS models are by far the most dominant among all, both sales and production of cameras from this line out number all the models. The secret of EOS models success lies in the technology which is used to make them. As the matter of fact, the latest Canon EOS camera named 1D Mark III Part 2 has received consumers' feedback as being the current best Canon camera in the world. When one uses this camera the cutting edge technology is immediately apparent, the images it produces are crisps, crystal clear and sharper than ever. If you need a camera that can capture all details of natural tones without much future editing, then this is the camera that you should have.

Both beginners and professionals alike, Canon cameras are very suitable and user friendly. Take PowerShot cameras for example, even though they are known as cameras that are designed for non professional photographers or beginners, they offer yet all sorts of features that allow a person to take high quality pictures comparable to those produced by fancier models. The PowerShot cameras are mostly owned by people that are not too much into photography but need a camera at hand to capture a moment or two, and the reason being, Powershot cameras are easily affordable and weigh no more than average mobile phones.

The ELPH models are basically Powershot cameras that have a few extra features added, for example image capturing modes and presets. In other words this group of PowerShot models can perform like SLR cameras, but still retain its convenience, size and simplicity. But of course along all lines of Canon cameras, ELPH models still cannot beat EOS models in terms of image quality it produces, EOS boast many elite features that only professional photographers appreciate.

EOS Canon digital camera series being design to suite the fussiness of professional photographers, has few SLR models to offer. But do not be scared to own this camera if you are a beginner, because it doesn't really matter whether you are only starting to shoot photograph or a trained professional, these cameras have the potential to provide high quality images. The EOS SLRs include the Mark's and the Rebels, which are super digital cameras juiced up with more loads of professional features and even image built-in processing programs. For those who are fond of snapping speed, the 35mm SLR models are most preferable.

The only downside of Canon EOS SLR and 35mm SLR models are perhaps their size, they are much larger than the PowerShot and PowerShot- ELPH models. So, if you need a camera that fits into your pocket or handbag, you may want to reconsider buying EOS. But if you are passionate about photography, then EOS should be your ultimate choice. With the EOS SLR 35mm and average SLR cameras, you can fit different lens pieces to for a particular type of photography, be it telephoto, wide angle and the standard zoom and what have you, Canon offers a full array of add on lenses each with its own unique set of capabilities.

Of course Canon digital cameras are good, since it is a well established brand that everyone trusts. So, if you are interested in owning one, we would like to encourage you to do so. Maybe they are not the cheapest cameras around, but for the quality that it offer and good warranty programs it is a price worth paying. Buying a Canon camera means you are investing your money!

Selasa, 21 Desember 2010

The Best SLR Doesn't Mean 35mm

The best SLR 35mm or full frame digital cameras on the market today, are probably the Canon EOS 5D Mark II 21.1MP, or the Nikon D700 12.1MP. But, do you really have to go the full 35mm or digital full frame equivalent to get a good SLR camera these days? Not likely, and let's have a look at some of the technical reasons why.

Do some reading, and the once confusing realm of SLR cameras will become clear. Once you get around the marketing hype surrounding digital SLR cameras, they really don't seem so complicated. If your someone who wants to understand all the finer points of any product before handing over your credit card, this could be a very lengthy adventure for you.

Well, let's start things up shall we. While the abundance of technology your facing seem like a lot, it's also kinda cool. Trust me, I wouldn't lie about that. It's a cut throat business selling cameras, and no one is more aware of that, then the companies that want to sell you a camera. Manufacturers and salesman alike, have to offer better options with their DSLRs and bribe consumers with the best prices.

Today, you'll stop dreading your impending purchase, as here's news you'll want to hear. I will guarantee, that you will be thrilled with your new camera, no matter which of the best rated single lens reflex cameras you purchase. Every camera in this stalwart group of fine cameras is worth the price. To prove it, just have a look at the features in this bunch of SLRs. I like any flavors in the Canon Rebel offerings. Don't get too hung up on the Canons though without taking a look at a Nikon D60 or Olympus Evolt E520.

You know that getting any of these cameras for less than a grand is bound to put a smile on anyone's face. At these prices, digital SLRs are really one of the few remaining gadget values left today. Even if it's not the best SLR 35mm Those of us that spent big money for very basic digital cameras just a short while ago, will know from whence I speak.

Don't make the mistake of assuming the camera you buy is the single most important factor in your picture taking process. You already own the most important piece of picture taking equipment, and that would be yourself. A gifted lensman can take engaging photographs with just about any camera.

Presently, buying your new camera online seems smart. Deciding to buy online is the best way to get the best value, and find a larger selection of cameras to choose from.

Even with hundreds of SLR camera (including the best SLR 35mm) choices, shopping for digital cameras online is pretty painless. Time to decide. So, as fun as checking out cameras online can be, it's a whole whack more enjoyable to be using one.

Senin, 20 Desember 2010

Improve Your Photography With Good Quality DSLR Camera Lens

Photography is a hobby for many. You can improve the quality of photography with good quality camera lens. If you are having a traditional camera with fixed focal length, you should change it to a new one that can provide you much flexibility and high tech features to try out.

With the wide variety of digital camera and lenses available in the market it is many times confusing to get a new digital camera with superb lens quality. But if you can look through internet you can find many of the websites that provides you the excellent reviews about the various models and makes for digital camera.
There are many of the websites that also provides you the complete information about the particular model of the brand. You can get all the information about the digital camera you are looking to buy.

Also you can compare several features like Megapixels, focal lengths, types of lenses, zooming features, etc. in variety of cameras from offered by different companies. Nikon, Kodak, Canon, Panasonic, Samsung, etc. are some of the most reputed and top selling brands in digital cameras that you can look for.

You should look for the quality of DSLR Camera Lens and other features while getting the best one for your use. It is important that you choose the best model so that it perfectly satisfies all your needs. If you are looking for the camera for your personal use you can get a simple and cheap one with low features. But if you are getting a digital camera for your professional use, you should insist on getting a top brand with high tech features. May be this will be an expensive deal for you, but you will get the best results that can help you to grow your photography business.

Varieties of DSLR Camera Lens

While looking for the best digital camera you should look for the types of lenses you need to get. There are many types of lenses to choose for. Different lenses are used for different projects and requirements. You can choose:

Telephoto lens: give you perfect shots when there is enough light. These can shoot from the distance and provides you some excellent picture quality. The longer the lens you can get better can you zoom. These range from 100mm to 300mm.

Wide lenses: are good for wide shots. If you want to have landscape photography, wide lenses are best to have. Wide angle lenses range from 35mm to 55mm and can give good pictures even in low light.
Lenses with fixed focal length: are the traditional lenses that come with fixed focal length. These are easy to use when you do not want many of the zooming options.

Hybrid lenses: can shoot wide angle shots as well as telephoto shots. These are excellent choice for all.

Dell XCD 35 Smart phone Review

Dell XCD35 Review :Dell XCD35 is a slim smart phone from Dell. This XCD35 providesgreat 3G experience with its HSDPA 7.2 MBPS. The new XCD35 comes with WIFI,Location awareness, 3.2 MP camera with auto focus, Android 2.2 OS and 3.5” TFT LCDcapacitive full touch display up to 256k color.
The price of Dell XCD 35 is approximately 10,990Rs. Note: Earlier this phone was coming with Android 2.1 version OS. If you have Android 2.1, then you can upgrade your XCD phone from Android 2.1 to 2.2 through Dell Service center or download from the website to enhance your smart phone user experience. For details for downloading applications of XCD35 visit Best Android Applications.

Pros and Cons of Dell XCD35:
Pros:
  • Bright and Crisp display.
  • Good processor and RAM capabilities to run applications and Games smoothly.
  • 3.2 MP camera
  • Fast responsive sensitive touch screen.
Cons:
  • Battery heats up a bit while charging.
  • No Flash.
Dell XCD 35
Specification of Dell XCD 35:

  • 3.5' TFT LCD capacitive touch screen display
  • Processor: ARM 600Mhz
  • Memory: 256MB, 150MB internal memory  and expandable up to 32GB
  • Connectivity: 3G,GPS, WiFi, Bluetooth,EDGE and GSM support.
  • Camera: 3.2MP with Auto focus
  • Java: Yes
  • FM Radio
  • Music player supports all the formats.
You can download applications and Software for Dell XCD35 from dell website as well as from Android market place.

    Minggu, 19 Desember 2010

    Basic Digital Photography - The Old Rules Still Apply

    For the majority of us, taking photographs is a rather "informal" event. We spend minimal time posing our subjects, setting up the shot, adjusting the lighting, and so forth. However, understanding some of the basics of digital photography and taking just a bit of time prior to pressing the button can greatly improve the quality of the pictures we create.

    Digital cameras introduced two great features into our world. One is the ability to delete pictures and try again. Beginning photographers need to experiment and practice. Digital cameras allow us to do this inexpensively. The second great feature is the ability to edit after the fact. However, the editing function is not unlimited and should not be used as a crutch; getting the shot right in the first place is still much more effective in creating quality images.

    Most of the traditional rules for creating pictures still apply with digital photography. What makes a good photograph is the same. Good photography is a topic of considerable study but for now a brief discussion about just a handful of tips that will make the most immediate improvement for the true novice is sufficient.

    Avoid blurry pictures by keeping a steady camera. Tripods are of course excellent for this purpose but aren't always handy or available. Without a tripod, you can grasp the camera in a manner that is comfortable for you; using two hands offers the best stability. Steady the camera by holding your arms next to your body with your elbows in close to your chest or stomach. You can brace yourself by keeping your feet apart or leaning against a wall, tree, or other object when possible.

    Don't be afraid to set up the shot. When working with people as subjects, it is easy to direct them for a better picture. When looking at the LCD you can see basically how the shot is set up. Would the shot be better if the subjects in a group stepped in closer together, if they removed their sunglasses, if they turned slightly, or looked over your shoulder versus straight into the camera? You are the director and can make alterations at that point.

    Another element of setting up the shot is to use an uncluttered background. If a person is the subject of your picture you want to eliminate all the other "distractions" in the surrounding area. A lot of background activity and other objects can take away from your intended subject. Sometimes just repositioning a bit and stepping in closer can help achieve a better background as well.

    Another general rule is to take pictures at the eye level of the subject. In other words, your view angle should not be from above or below. This allows much more detail, the ability to see expression, emotion, personality, and so forth. This doesn't necessarily mean that the subject must look directly into the camera however.

    When shooting people, animals, and wildlife it is usually best to move in close. Closer shots can dramatically improve your results. In some instances stepping in closer is not an option but in these instances you can use zoom to come in closer to the subject. Too close is 3 feet or less, this kind of proximity can result in blurry pictures. Special lenses are used for ultra up close photography.

    Lighting is probably the most critical factor in image quality and it will be discussed in greater detail in a later article. For now it will suffice to say that mid-day often does not produce the best pictures. The lighting is harsh, it creates shadows, and it can alter the colors you are trying to capture. In general, you want the sun behind you but you need to be sure your shadow is not in the picture! When shooting people you also need to be sure that the sun is not forcing them to squint.

    These are just a few of the most basic tips for creating the kind of images you want. To master these concepts practice is critical but the happy news is that they don't really require a great deal of time or require any additional equipment and expense.

    Sabtu, 18 Desember 2010

    Nokia X3 review-Specification-Price

    Nokia x3 is slim and budget friendly mobile phone. Nokia X3 has non touch screen and modest memory mobile phone. Even though x3 is a budget phone, it is a very good music phone. x3 has sporting bright red or blue music controls down the side of the display. This X3 comes bundled with 2GB memory card and 3.2 MP camera. Nokia X3 price in India is  6200Rs.
    Nokia X3

    Pros and Cons of Nokia x3:

    Pros:

    • Decent ear phones.
    • 3.5mm headphone socket
    • Bundled 2GB memory card.
    • Nokia trade mark of simple interface and email setup.
    • Quality music player software.
    Cons: 
    • Call performance is not upto the mark.
    • 3G and Wifi are not available
    • 3.2 MP camera is average
    Specifications of Nokia X3:
    • 3.2 mega pixel camera with enhanced fixed focus
    • 4x digital zoom
    • Flash light 3.0
    • Up to 16GB microSD card support
    • Bluetooth v2.1
    • USB connectivity
    • 2.2-inch active TFT 16M color display
    • Screen resolutions of 240 x 320 pixels
    • GPRS/EDGE//WAP 2.0/xHTML
    • E-mail
    • 860mAh Li-Ion battery
    • Talk time 7.30 hrs
    • Standby 380 hrs
    • Dimensions 96 x 49.3 x 14.1 mm
    • Audio and Video player with playback option
    • 3.5mm audio jack
    • Stereo FM radio
    • Stereo speakers
    • 46MB phone memory
    • Include 2GB memory card
    • Weight 103 gm
    The Nokia X3 Box Contents
    • The Nokia X3
    • 2GB microSD expansion card
    • Charger
    • The Nokia WH-205 stereo headset
    • MicroUSB cable
    • User guide
    • Software CD

    Nokia C3 Review-Specification-Price

     Nokia Mobiles release one more beautiful mobile phone called Nokia C3.  This C3 has a sleek design with full qwerty keyboard. This Nokia mobile is based on S40 platform. Nokia C3 mobile has a very standard display format and  its 2.4 inches and the handset in itself is very easy in the aspect of handling it. This handset bundled with a 3.5 inch plug and USB connection. The Nokia C3 price in India is 5500Rs.
    Nokia C3

    Features of Nokia C3:
    • QWERTY keypad
    • 2MP camera.

    Pros and Cons of Nokia C3:
    Pros of C3:
    • Good mini Qwerty keyboard
    • WiFi
    • Facebook and Twitter integration
    • Top mounted 3.5mm Jack
    Cons of C3: 
    • 3G connectivity is not there.
    • Browsing experience is not pleasant.
    • Camera clarity is not as expected.
    Specifications of Nokia C3:
    Camera: 2MP
    Camera zoom: Digital zoom.
    Video playback: Yes
    Email: Yes. Push mail.
    Phone memory: 55MB
    Memory slot: Micro SD( Transflash), upto 8GB
    FM radio: yes. Stereo
    3G: No
    Wifi: WiFi 802.11b/g
    OS: Java
    Bluetooth: Yes. Ver 2.1 with A2DP
    GPS: No
    Entertainment: Games,FM Radio, Music Player.
    Java support: Yes.
    Standby time: Upto 480 Hours
    Talk time: Upto 7 hours.

    Package of Nokia C3:
    • Headset.
    • Charger
    • USB cable.
    • User Guide.

    Olympus - A Name Famous For Quality Digital Cameras

    Olympus have always been associated with high quality cameras, and their digital range are renowned for delivering photographs which match, or for the most part surpass, higher resolutions digital cameras. Based on their low number of product returns or repairs they are recognised for their consumer satisfaction ratings, which is one the best in the industry.

    Although the first photographic product was manufactured by Olympus, which was the Zuiko 75mm/F4.5 lens for the Semi-Olympus camera in 1936, their success story as a manufacturer of small original cameras began in 1959 with the launch of the Olympus Pen range of cameras. Digital camera technology was introduced to their production line in the late 1990s and continued alongside their film cameras until 2001 when they decided to discard the 35mm SLR system and concentrate solely on their digital camera range.

    Olympus digital cameras are treasured by many photographers around the world, with the outstandingly high-quality images they produce responsible for their popularity. The Olympus family of cameras are considered by many to be one of the easiest to use and understand for the professional, serious amateur and novice alike.

    Constantly at the leading edge of innovation, Olympus cameras have always offered every type of end user a camera to suit their needs. Whatever level of photography you are at there is one to suit you. Below is some of the range that covers every level of photography.

    Olympus FE-310

    An impressive model incorporating a metal cased body for extra durability with 8.0-mega-pixel, 5x optical zoom and a 2.5-inch LCD screen.

    A wonderful entry level to digital photography, this pocket sized easy to use camera boasts remarkable power. The Olympus FE series are recognized for their extreme accessibility, impressive image results and appealing price.

    OLYMPUS Mju 725SW

    A hardwearing all-metal constructed camera with 7.1 mega pixels, a 2.5 inch LCD screen and 3x optical zoom.

    The OLYMPUS Mju 725SW was built to withstand abuse at the hands of the user and can endure being dropped from a height of up to 1.5 metres and is waterproof up to a depth of 5m. Although built for life's rougher side and a great choice for those who enjoy outdoor pursuits this camera doesn't disappoint when it comes to image quality and ease of use.

    Olympus SP-550UZ

    A semi-professional compact with 7.1 mega pixels, 18x optical zoom and 2.5 inch LCD display.

    The compact size, functionality, long zoom range and easy handling make the Olympus SP-550UZ a very popular camera. A super zoom camera that is not only robust but also has a very appealing design and versatility, enabling it to be used as a point-and-shoot, but also allowing advanced creative control.

    Olympus Evolt E510

    A digital SLR designed to improve your skills as a photographer with 10-megapixel and a 2.5 inch Live View Hyper Crystal LCD display.

    With comfortable controls, small lag time, easy to operate, strong construction, anti dust system and anti shake feature the Olympus Evolt E510 seems to have everything and no wonder it's proving to be a remarkably popular camera.

    The objective of Olympus is to produce fulfilling, easy to use and swift digital photography products for the normal end user. Olympus digital cameras are world-renowned for delivering outstanding image quality and innovative designs and a model that's ideal for you is sure to be within their range.

    Kamis, 16 Desember 2010

    Micromax W900 Review

    Micromax mobiles new product is Micromax W900. The micromax w900 price in India is approximately 7500Rs. This Micromax w900 specifications are really good and the price of  w900 is very pocket friendly.  This mobile is the first  micromax low cost windows mobile. The w900 is a quad band featured with the latest windows 6.1operating system. The WQVGA display of 3.2 inch is compatible upto 262k colors. The specifications and price of w900 makes this micromax mobile one of the best low cost multimedia mobile phone.
    Micromax W900

      The major highlights of this w900 is its powerful voice assisted GPS navigation, MS office and upto 16GB expandable memory.  It has 2MP CMOS camera with flash. The media player of w900 is capable of playing almost all the types of media formats. The bluetooth, GPS, motion sensor, WIFI, EGPRS, Games, 3.5mm jack makes this phone worth buy.

    Specifications of W900:
    Camera: 2MP with Flash
    Video capture: Mp4, WMV, H.263, AVI
    WiFi: WiFi 802.11 b/g
    Internet: GPRS class 10, EDGE, WAP
    Music player: MP3, AMR, MIDI, WMA
    Games: Yes
    Ringtones: Yes
    Operating System: Windows 6.1
    Standby time: Upto 480 hours.
    Talk time: Upto 5 hours
    GPS: GPS with maps from Map My India


    Package of Micromax w900:
    Kit: Handset, User guide, Stylus, CD
    Charger: Included
    Battery: Included
    Headset: Yes
    Speaker: Yes
    Battery weight 113g


    Tags:micromax w900, micromax w900 price in india, micromax w900 price, micromax w900 specifications,micromax mobile w900 price,price of micromax w900,micromax mobile w900,micromax mobile,micromax mobile price list,micromax mobile price in india,micromax mobile phones,micromax mobile prices,w900 micromax

    The Benefits of Underwater Digital Cameras

    Underwater digital cameras are fun and easy to use under the water and great above the water as well. Use your underwater digital camera in all kinds of weather, for many activities and in a variety of locations that could be either wet or wild.

    Are underwater digital cameras better than the film underwater cameras? It's up to you to decide. The digital camera cannot run out of film. It has the ability to delete bad shots or change to a lower resolution if you need extra shots.

    They have better (up to 4 times) depth of field. This is also great for wide-angle photography in low light conditions. Shooting with film at f4 would typically produce fuzzy backgrounds and edges. The same scene shot in digital will give you sharp photos

    When using a strobe, most film cameras are limited to shutter speeds of 1/60th - 1/250th of a second. The new consumer digital cameras don't have mechanical shutters and will sync at speeds up to 1/800th of a second. Therefore, you can shoot in bright shallow water where high f-stops would make strobes ineffective. Higher shutter speed options allow you to keep your f-stop at a better setting. These high shutter speeds are also great for freezing light rays and fast action.

    35mm zoom lenses don't do well underwater. They are bad at close-focus. The built-in lens in the new digital systems offer a large zoom range with minimum focus ability to 8 inches or less. So if you had a new digital camera and a high quality aspheric housing port, you could take a 100degree wide-angle shot and zoom into 1:3 macro shot without changing lenses. Who likes to change lenses all the time?

    Underwater digital cameras are small and lightweight, and the quality is comparable to film if you go for the higher resolution shots. Scans and digital camera images require a small amount of sharpening in Adobe PhotoShop®. Just apply the ""unsharp mask"" filter for an instant improvement.

    Underwater digital cameras are not perfect, however and like video, the cameras have a tough time with high contrast scenes. Also, it's fairly expensive to transfer your digital files to slides if you are interested in having your images presented in slide shows. However, most digital cameras allow you to plug directly into a television for image display. And there are digital projectors on the market that produce brilliant images and even professional presentations complete with audio tracks.

    Unfortunately the underwater digital camera has not fixed the one worst digital camera problem: when you press the shutter release, the camera will not immediately take the picture. This shutter delay could be a problem--fish swim fast.

    If you're just starting with underwater photography, it would probably be best to purchase a digital underwater camera instead of a film underwater camera. The instant feedback of digital imaging will take years off your learning curve. With the 5 megapixel cameras, print qualities are great.

    Regardless of your photo experience, think about your goals with underwater imaging. Shooters looking for instant results, quick web posts and prints of 11 in. x 14 in. and smaller will be thrilled with digital. Digital is probably the best solution for all new shooters that are comfortable with computers. Instant feedback is always great.

    If you are still not sure, however, try out the equipment before you buy it. Take a class with demo gear and instruction. Then buy something wonderful and go out and have a great time with your new digital underwater camera.

    Rabu, 15 Desember 2010

    Determining Which Digital Camera You Should Purchase

    Have you been considering starting a photography business for yourself, or do you need to get rid of that old camera that you've been using? The possibilities are endless when it comes to digital cameras and when you want to purchase one you have to determine which one is perfect for you.

    You'll find that there are certain things that will persuade your decision to purchase one type of digital camera over the other. Such factors include your budget, your preference for certain features, and even the particular brand that you prefer.

    Perhaps the most important factor that you'll have to work with when buying your digital camera is your budget, which if it is small will limit your final buying decision. If you have a lot of money to work with, then you can afford to purchase a camera that has a lot of features and picture taking capabilities.

    Digital SLR cameras can provide you with lots of features that help you take wonderful pictures. If you have a larger budget, than chances are you can afford these types of cameras. If you plan on making picture taking your profession, you would be better off pursuing these types of cameras.

    So you see, if you want to become a professional, then you're going to have to invest a little more money. If you're not looking to make a career of it, then you can spend a little less and still get a digital camera that takes really good quality pictures.

    Digital SLR cameras typically provide a lot more features such as panoramic capability, auto zoom and auto focus, high resolution pictures, and more. Professional photographers typically purchase these types of cameras so that they can produce high quality, detailed portraits and other types of pictures that people will purchase.

    The one other factor that you might consider when buying a new digital camera is the brand that you prefer. If you have a certain brand preference, start there, and then decide which type of camera is appropriate based on the other factors that we have mentioned.

    Selasa, 14 Desember 2010

    Photography Lenses - What You Need to Know

    Photographic Lenses - A perspective from an avid shutterbug

    Have you ever wondered why photographs turn out different than what you saw through the viewfinder? Why is my photography blurry or out of focus? How do I capture more of the subject area in the photo? How can I get closer to the subject? Why is the photograph darker than suspected? I have had these questions over the years and have studied photography lenses so that I can select the most appropriate camera and camera lens for my subjects.

    Today, with the most wonderful world of photography , and the technology at hand, it is much easier to shoot those prize photos even for the weekend shutterbug. But, if you understand even a few basics your photographs can turn out much better than you anticipated. It has become really easy for anyone to pick up a point and shoot fixed lens digital camera and take a great photo. With the influx of many high end, high megapixel cameras available for under $200.00, anybody can put memories in their pocket.

    I started out shooting photography and using several types of photography lenses in the early 1980's. My uncle introduced me to Pentax SLR equipment as he had a wholesale representative contact in Denver. I was able to purchase thousands of dollars worth of equipment for pennies on the dollar. And, so began the journey with my Pentax LX professional line of equipment. My photography lens arsenal was made up of many types such as wide angle, zoom, telephoto, macro, and standard camera lenses . I had a motor drive, high end camera flash, tripods, camera lens filters, lens hoods and more to get me started. As an athlete my first love was shooting sports which involved fast film, fast lenses, and a zoom lens. I soon fell into shooting landscapes, wildlife, and weddings. And, let me say, all for free. I loved taking pictures and giving them away to people who did not understand how to capture those prize memorable moments behind the lens.

    So, what makes up the chemistry of photography lenses? How do they work and when should I use one over the other? Today it is so easy to get that all automatic digital SLR camera and lens and hope that the subject turns out as you thought it should. I think these automatic cameras are great. However, if you understand how to utilize other photography lenses in a manual mode you can still produce beautiful photographs. I actually have a Nikon D70 digital SLR camera today in addition to my Pentax LX and Nikon Coolpix pocket digital.

    Photography Lenses Explained

    Camera Lens Types:


    Wide Angle

    The wide angle camera lens enables the photographer to shoot a photograph when you wish to encompass more of the subject scene than would be possible with a standard lens such as a 50mm focal length. Wide angle camera lenses are typically a shorter focal length under 50mm and allow the photographer to change the perspective of the scene. A moderate focal length is about 24mm to 35mm that have apertures of F/2 or F/2.8 which allows more light in. There are also extreme wide angle lenses , called fisheyes, that can produce almost a 180 degree photo. These photographic camera lenses can be fun however, make sure you understand that the lens may produce a rounded image and the depth of field can be limited in low lighting conditions.

    Standard

    Standard lenses are typically the 50mm lenses. These are a fixed focal length and are the lens of choice on most SLR cameras . Everyone should have this camera lens . It typically will be used the most for everyday common photography. The 50mm standard lens is about what the human eye can see in the field of vision. It also produces the most relative size of the subjects and objects in the photograph. This camera lens can be one of the fastest lenses in your camera bag. It can be purchased with a low aperture of F/1.4 which will allow for very low lighting photographic opportunities.

    Zoom


    The zoom lens is my favorite lens. This camera lens gives the photographer so many options especially if you are not carrying two camera bodies with you. The zoom camera lens is not limited to one focal length but has movable elements in the lens that allow for multiple ranges. Zoom photographic lenses are available in many sizes but the typical lengths give you anywhere from 35mm - 70mm and 80mm - 200mm. I recommend these two lengths for the weekend hobbyist so that a full range from 35mm - 200mm can be achieved. These lenses can be expensive especially if the aperture is under F/4.0. They are typically not used in low lighting conditions or with motion photography unless you are shooting in daylight with sunny conditions. For most photography hobbyists, the 80mm - 200mm works great for sideline photographs and has enough focal length to capture images such as wildlife from a distance.

    Telephoto

    Telephoto camera lenses have a focal length that is longer than a normal 50mm lens. The longer the length of the telephoto camera lens the more magnification you can get and the closer you can draw near to your subject. These camera lenses differ from the zoom in that they are fixed and cannot provide the photographer a range of lengths. Most telephotos are used where the subject is static and situations where you are restricted to keeping your distance. They usually come with a smaller aperture somewhere around F/4.0. Careful selection and use must be made when using these lenses as they can be heavier and blur photographs with the slightest movement. I would recommend a tripod or monopod for use with lenses longer than 200mm. They are absolutely great for sports and wildlife photography. I have used anywhere from 100mm to a 500mm mirror telephoto. The 500mm mirror lens was really nice when shooting at an air show.

    Specialty

    There a couple of specialty camera lenses that I'll talk about. The first photographic lens that is a must for close- up photography is the macro lens. This lens can come in a few focal lengths that are typically less than 100mm. The macro camera lens enables the photographer the ability to shoot subjects extremely close-up such as flowers, insects, and commercial products. These camera lenses are really fun and can produce beautiful images that fill the frame with wonderful color and detail. I have done a lot of macro photography and recommend that a tripod be used when shooting these subjects so that blurring is limited. These lenses can also have lower apertures so that long exposure under low lighting can be accomplished. The other type of specialty lens is the perspective control lenses that will take close up photographs and keep the subject sharp in focus and prevent the depth of field from distorting the subject. I have not used these types of lenses so I cannot give you a real life example. However, for most non-professional photographers this lens may not be worth the investment. Finally, I will mention the 2x converter. This photography lens cannot stand alone but augment another lens by boosting the focal length by two times it's standard length. You simply add it between the camera and your lens of choice and the optical mirrors magnify the image by two. I use this often outdoors shooting sports on sunny days where I have a bunch of light. This will boost my 300mm zoom to 600mm. And, I can get really close to my subjects from the sidelines.


    Photography lenses today provides the shutterbug an array of opportunities for photographic design. Depending on the type of photographer you are, it will determine the types of camera lenses you put into your camera bag. I would suggest that everyone has at least a mid-range zoom. If it is the only lens in the your budget at time of purchase, you can add other camera lenses later. The 35mm - 70mm would be my recommendation. If you are going to shoot athletics you will most likely be on the sidelines or in the bleachers and will need up to a 300mm telephoto or zoom. Depending on your budget I would suggest a lower aperture but nothing more than F/4.0.

    Have fun and remember that you can take oodles of pictures today and test your photographs much easier with digital SLR photography . If you don't like your results, delete them. Then, go out and take more pictures!

    To your photographic success.

    Senin, 13 Desember 2010

    Digital Photography - Advantages of Full-Frame Digital SLR

    DSLR cameras are typically equipped with either an APS-C size sensor or a larger, full-frame sensor. Full-frame cameras are generally bulkier, more expensive and require larger, full-frame lenses. If you've been wondering what advantages a full-frame dSLR offers and whether the benefits justify the bulk and expense, this article will explore the strong points of full-frame sensors.

    Nearly all 35mm film cameras were designed for a frame size of 24x36mm. There were a few quirky SLRs that used a different film size, and medium format SLR cameras used much larger 120mm film. Overall, however, the typical film SLR standardized on a frame size of 24x36mm.

    The first dSLRs created a dilemma for camera-makers. It was difficult to build a sensor the size of a 35mm film frame. Availability of larger sensors was limited, and the quality of some early 35mm size frame sensors was questionable.

    For this reason, dSLR makers adopted a sensor the size of the APS-C film frame, which measures 15.7x23.6mm. APS size sensors were simpler to make and while smaller, offered sufficient quality for most users.

    By the time digital technology evolved to where it became practical to build reasonably priced full-frame cameras, APS dSLRs had become the standard. While the majority of dSLRs still use the APS size-sensor, full-frame cameras appeal to photographers for several reasons:

    Image quality

    Since an APS image will require more enlargement than a full-frame image to obtain a specific size, prints from a full-frame image will almost always be superior. For small photos, the difference is marginal, but 8x10 and larger prints are noticeably superior from a full-frame camera.

    Improved Dynamic Range

    Dynamic range refers to the ability of a camera to capture detail in both the shadows and the highlights. Manufacturers use different methods of processing images inside the camera, so it is difficult to compare dynamic range between brands. Overall, however, smaller sensors capture less dynamic range. This means prints from the full-frame dSLR have better tonal range.

    Less Image Noise

    Many photographers assume a manufacturer can cram any number of pixels into a sensor, so sensor-size is irrelevant to pixel count. In reality, sensor dimensions determine the size of the individual pixels. For a sensor of any given pixel depth (megapixel rating) full-frame sensors will contain larger photo-sites (pixels). Larger pixels collect more light, so there is less need to amplify the signal. Amplification translates into heat, which increases image noise. When you compare sensors of the same pixel count, a full-frame sensor will generally control image noise better than its APS cousin.

    Availability of Wide Angle Optics

    Cameras with an APS-C sensor are often referred to as "crop" cameras, because the smaller sensor captures a reduced portion of the image compared to a full frame sensor. In other words, an APS size sensor crops the image that a full-frame camera would deliver.

    This magnifies the effective focal length of the lens. A 200mm lens on an APS-C camera will capture an image roughly equal to a 300mm telephoto on a full-frame dSLR.

    At first this might seem to be a big advantage, and many wildlife and sports shooters choose crop cameras for this very reason. They get a longer focal length without the need to invest in super-telephoto optics.

    Of course the focal length magnification applies to all lenses, so it becomes difficult to find suitable wide-angle lenses for an APS sensor camera. They can be had, but they are rare and expensive. Fast wide-angle primes are particularly hard to come by. So those who shoot landscapes, interiors or other wide-angle subjects will find a full-frame dSLR offers a major advantage.

    Greater Selective Focus Options

    Selective focus, the ability to isolate subjects from the background, is closely coupled to shallow depth of field. Although a number of elements affect overall DOF, selective focus increases as you get closer to your subject. Because the smaller sensor magnifies the image when compared to a full-frame camera, you have to move farther away to get the same composition.

    The result of this is that for any given focal length, you will see less selective focus with an APS-C sensor, because you need to shoot from farther away to achieve the same image crop. Long telephoto lenses are capable of delivering nice selective-focus effects on an APS-C camera, but on the whole, you will achieve greater, more pleasing selective-focus with a full frame camera, particularly with shorter focal-lengths.

    Ability to use lenses at their designed focal length

    On a 35mm camera, a focal length of 35mm is considered a wide angle, while a "normal" lens has a focal length of 50-60mm. Telephotos start at around 85mm.

    Because of the crop factor, a normal lens on a APS camera would have a focal length of 35mm, while a 50mm lens is equivalent to a 75mm lens. An extreme full-frame wide-angle of 16mm would only offer the view of a 24mm lens when coupled to the APS-C camera.

    This might seem to be an exercise in semantics, but many photographers have favorite lenses, and are distressed that they cannot use them as they could on a film camera. This problem is compounded because they may not be able to find a suitable lens to give them the same effects on an APS-C camera. High-speed 50mm lens are quite common, but it is difficult to find a 35mm f/1.4 optic. In other words, very fast "normal" lenses are practically nonexistent for APS-C cameras.

    Whether any of these factors are relevant to you will depend on your subject, your final application and your style of shooting. For many photographers, the APS-C sensor will provide all the quality and composition ability they need. For others, however, full-frame sensors offer superior images and special effects that cannot be duplicated with a smaller sensor.


    Do you want to improve your photographs? Take better pictures with the help of the Photography Basics resource at Alphatracks.com. You'll find free, easy to understand information about cameras, lenses, lighting and basic photography techniques.

    Tom Bonner is the author of the Sony Alpha DSLR - A300/A350 Digital Field Guide, published by Wiley Publishing.

    Sabtu, 11 Desember 2010

    HP PhotoSmart 375 Printer

    HP has done it again. Long an excellent producer of computers and printers, HP has rolled out their latest innovation: the HP PhotoSmart 375 Printer. This particular model allows users to print directly from their digital camera, camera phone, or Bluetooth device without needing a computer. Please continue reading to find out why this product will be a winner with consumers just like you.

    If you made the transition from a 35mm camera to a digital camera, you know one of the differences between the two is the storage and printing of your pictures. With a 35mm camera, you are accustomed to taking your film to a store for development and receiving your pictures back with negatives. With a digital camera you store your pictures on your computer's hard drive [once you copy them from your camera] and then print out your pictures to your inkjet printer.

    While the idea of controlling your own photo printing sounds wonderful, many people will tell you that it isn't quite "reality" for them. Sure, you can download your pictures to your hard drive [if you own your own computer in the first place], but going to the next step -- printing out your photographs -- isn't a given.

    First of all, you must own a quality inkjet printer as well as a computer. Next, the paper you purchase must be of an absolute impeccable quality otherwise your pictures would either bleed or fade. Finally, trimming the photos to an exact 4x6 size is not an easy thing for you to do. Oftentimes the edges come out ragged, which is not something you would want to stick into a photo album or share with loved ones.

    The solution for consumers like you? Wait for manufacturers to develop separate machines that would not require digital camera owners to use a computer or inkjet printer to print out photographs. The HP PhotoSmart 375 Printer has met this need.

    So, what are the chief features of the product? Read on:

    Connects directly to cameras, digital media, and Bluetooth devices.

    2.5-inch color LCD screen.

    Lightweight desktop unit with a small footprint.

    4800 dpi x 1200 dpi for color photographs; 1200 dpi x 1200 dpi for black and white photographs.

    Mac and Windows compatible.

    Good print quality; 4x6 paper output only.

    Requires only one printer cartridge.

    Pictures print in approximately one minute.

    Affordably priced.

    The unit retails for $199, but I have seen it on sale for less than $150, so it pays to shop around. A note of caution: make sure that the sale model isn't refurbished.

    All in all, the HP PhotoSmart 375 Printer is a product that will get your attention. Compare this model with earlier HP models as well as with competing products from Epson and Canon. For the price, quality, and engineering, you will quickly agree that the HP PhotoSmart 375 Printer model is the clear winner.


    (c)2005; Matthew C. Keegan, LLC

    Matt Keegan is The Article Writer who writes on a variety of topics including: Aviation, Business, Customer Service, Finance, Travel, Product Review, Christian Themes, and more. Please visit his website for additional information: http://www.thearticlewriter.com

    Jumat, 10 Desember 2010

    35mm Slide Scanner Information


    Image : http://www.flickr.com


    When it comes to digital imaging there is no better choice than a slide scanner. 35mm slide scanners scan your old negatives and slides so that they can be saved, enjoyed, and viewed for years and years to come. It can be a real pain in the butt to try and find an old projector to show slides on, and even harder to keep track of the slides themselves.

    Being able to scan old negatives onto your computer and have a digital backup is a great way to preserve and polish these precious memories. Once saved as a digital image, they can be fixed up into very quality high resolution photos.

    35mm slide scanners come in all shapes and sizes and can range from just $100 bucks to thousands of dollars, depending on how serious your scanning is. If it is just for personal use I would recommend a much smaller scanner such as an Ion or Vutone. But if you are using it in mass batches I would upgrade to a Braun or something on the higher end. There is an initial investment of course but if you do enough scanning it will pay off in the long run. It all depends on what you are using it for and how much time you will be planning on using it for.

    You can find 35mm slide scanners at any home office store and especially online. Look for internet specials and inventory clear outs to find the best deals. The more research you do the better chances you have of finding a cheap but quality scanner. Be sure to check online shopping searches on either Google or any other search engine and do your homework.

    Kamis, 09 Desember 2010

    Choosing Canon Camera Zoom Lenses


    Image : http://www.flickr.com


    If you are planning to buy a digital camera, we wish you good luck choosing, considering the fact that the array of choice is overwhelming. There a literally hundreds of brands and thousands of models available on the market today, it is not too much to say that it is easier to navigate through the jungle of Amazon than to know each camera in details and make comparisons. As for the task of finding the most suitable Canon zoom lenses for your camera, it is even more daunting, but yet possible and fun.

    The idea behind choosing Canon zoom lenses is, you own or you want to own a camera with interchangeable lenses, each with its own unique capabilities. People who are not much into photography would tend to shunt away from cameras that require changeable Canon Zoom Lenses, meaning simple point and shoot cameras that are equipped with fixed lens which you are not able to change.

    Now this brings us to the questions we need to ask ourselves if we are to choose a Canon Zoom lens. First, from the above mentioned point, are you content with fixed cameras lenses or you want more powerful distance and angular capture ability? Second, consider your budget. Usually at the initial purchase of a camera with changeable lenses, extra lens pieces are not immediately purchased, and latter as financial capability allows, more lenses with different capabilities are added to the arsenal. Third, let's say you are not satisfied with the camera that you purchased and you decide to change. Then will the same set of lenses you purchased fits the new camera?

    To make things simple for you, Canon zoom lenses can generally be divided into 3 categories, they are classified according to how big the field of vision they can include into a picture and how much details they can capture, and the field of vision they capture of each lens is defined mathematically by an optic physic property called focal length of the lens.

    So, let's say you want to refer to a lens as "normal", this means it must roughly able to capture the view that one normal human eye can. Speaking in technical language a "normal" lens has a focal length of 50mm or so (if your camera is one of Canon EOS models, SLRs, or Cameras that capture images using 35mm films). Now, just as your eye sight, "normal lenses" are only good if you plan to take pictures in a normal close range, NOT good if you want to further zoom in into details, NOT good also if you try to take a picture of an object from a distance, and so, normal 50mm lenses are good when you are taking a waist-up portrait of a person in an ordinary room. To do more than that, it seems you need more "powerful lenses".

    Let's get down into more details, Canon zoom lenses that are known as "wide-angle" are those that are designed for the purpose of capturing a larger area field of vision. Wide-angel lenses have 2 most common uses - first, it allows a photographer to rotate 180 degrees to capture panoramic landscape scenes, and second, it allows photographers to capture details of larger areas. Let's assume that you would like to take a photo with a group of friends at a party, in this case surely you need to get everyone into your picture, and for this purpose a wide angle lens is therefore suitable, unless you can climb high or move back up far enough to put everyone into view. On a Camera that records pictures in 35mm film, a wide angle lens would have a focal length of 35mm or less.

    On the other end of the spectrum is telephoto Canon zoom lens, the concept of this lens is similar to using a telescope, which means it can put a selected scene into focus and capture more details out of that scene. The final result of picture taken is, the subject or a scene that is being focused on seems much closer than it really is, and finer details can be seen. Telephoto lenses have a focal length up to70mm or more on a 35mm film camera.

    We suspect that up until this point you still haven't a single clue as which Canon zoom lenses you need. The categories and description given above are merely just a rough overview and brief introduction to get you acquainted. The decision of which Canon zoom lenses to purchase depends on the kinds of picture you want to take and your experience.

    Rabu, 08 Desember 2010

    Tutorials in Digital Photography

    Michael loved taking pictures with the camera. This person started out using the 35mm. Model first that didn't have any accessories such as the zoom lens.

    It was only after saving up enough money working at the local bar that this individual can afford to buy a camera just as good like those used by the professionals. There were not that many models anymore where the user has to reload the roll of film.

    The old ways have been replaced with digital cameras where the images are saved into the memory card that can be uploaded into the computer.

    Michael thought that this is great since there won't be additional costs anymore in having film developed. Since there was a computer at home, the digital camera can be hooked up and burned to a CD or developed using the printer.

    After looking around, this person decided to get the Sony digital camera. This had 8.1 pixel graphics and was friendly. Each unit came with a manual, CD and charger.

    Each time a customer makes a purchase, a short tutorial is given so the person will have an idea how to use it before leaving the shop.

    It was hard to remember everything the clerk said at the store. When Michael got home, the manual and the digital camera were examined to be able to know every part of this new toy.

    The CD that came with the unit was installed into the computer. This gave Michael also an online tutorial of how to use the camera, how to upload and have the pictures developed in the printer.

    It didn't take long to learn everything so that the digital camera can be brought out and used to take pictures. A friend at work who bought a similar item advised Michael to get some trial shots.

    Since the images can be deleted from the memory, many pictures can be taken and reviewed. Those that are good were saved in the computer, which was sometimes used as the background in the desktop.

    The digital camera is easy to use. The individual can learn using the tutorial features in the CD or learn more about this by logging into the manufacturer's website.

    The innovations in these small devices change every few months rather than years. This means the pixel graphics will improve making the model bought obsolete. The individual can upgrade the digital camera or choose to buy a new one later on.

    Selasa, 07 Desember 2010

    Wolverine 35mm Film Scanner - Advantages and Disadvantages


    Image : http://www.flickr.com


    There are many 35mm film scanners available today that can be used to convert your old 35mm photos into digital format. However, many of the high end scanners can cost a thousand dollars or more. Many people would just like to get their old family photos preserved and are not professional photographers looking to buy expensive equipment. The Wolverine F2D 35mm film scanner, which retails for $100-$150, is an economical option that might make a good choice for you. Like just about anything you purchase, this scanner does have its advantages and disadvantages that you will need to consider.

    Some of the main advantages of this Wolverine 35mm film scanner are its ease of use and speed with which it converts your film or slides. The scanner is a stand alone unit. You just plug it into a USB port or AC wall unit. There is no need to use software or a computer. You just push a button and the machine automatically stores your digital images onto a SD memory card. You can then look at them on the scanner or transfer them to your computer. The other advantage of course is the price. At $100-$150, this film scanner is much less expensive than many other scanners. So to summarize, the Wolverine F2D is easy to use, fast and inexpensive.

    The biggest disadvantage to this scanner is the picture quality. Some users have complained that the images are too dark and that all the original details are not preserved. Many customers have been very satisfied with the quality and say they use Photoshop to do a little touch up, while others are unsatisfied. So if image quality is very important to you, then you might need to consider a more expensive film scanner.

    Senin, 06 Desember 2010

    Getting the Film Look From Video

    Getting the film look from video has always been considered the "Holy Grail" for video directors.

    The fact of the matter is that film will never look exactly like video and vice-versa (although new cameras and systems such as the RED are getting extremely close). They are two completely different things. 90% of making your video look like film happens before it comes into the camera.

    However there are a couple of items to bear in mind when trying for the Holy Grail, 4 in fact.

    The four items are:

    1. Frame your shot well

    2. Light your shot well

    3. Use shallow depth of field

    4. Shoot at 24FPS (or as near as you can).

    If you can do these 4 things for every shot then you will have video that looks infinitely better than 99% of the stuff that appears on Youtube.

    For a really interesting demonstration and discussion about 'film look from video' (or, more accurately, what is it that you have to do to make a film look like video), listen to the directors commentary of Cloverfield with Matt Reeves. He had the opposite problem in that he had professional cameramen who had to 'un-learn' what they knew to make the footage they shot look like it was amateur video

    Frame Your Shot well

    Well framed shots use what's know as 'The Rule of Thirds'. The theory is that if you split your frame into three both horizontally and vertically the action should occur where the lines meet.Putting the action at the intersection of the 'rule of third' lines creates a more interesting framing than putting it in the centre.

    This applies to amateurs shooting video - if you're Spielberg shooting 'Saving Private Ryan' you can have as much extraneous movement as you want - even if it does make your audience sick

    The other secret with framing is to make sure you only show the absolute minimum you have to in order to tell the story. Frame things as tight as you can. Don't have extraneous movement of the camera.

    Light your shot well.

    Lighting makes more difference to a movie than almost anything else (Actually sound makes a big difference as well), so make sure you use light properly. Look at Youtube and find a well shot film. Chances are the good shots are all lit in the same way. The subject is well illuminated and the scene looks like you would expect it to be in a film. This is through the use of creative lighting techniques (know as '3 point lighting') to isolate the subject, light the subject and provide a mood. A lot of this can be altered in post production, but there is no substitute for actually having good quality footage to start with.

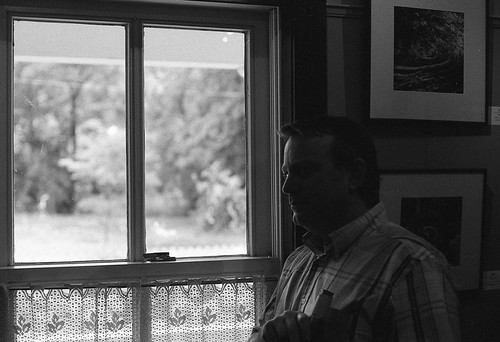
    Use Shallow Depth of field

    One of the key differences between film and video is the use of focus. A shot which has the subject in sharp focus and the background blurred is automatically assumed to be more 'filmic' than one where everything is in focus (although this is not always the case as 'Citizen Kane' is a movie that has almost all the movie in ultra sharp focus at all points). This is known as depth of field.

    Video cameras generally have a deeper depth of field (i.e more things in focus) because of a technical matter to do with the size of the chip that actually records the image. In a 35MM camera the effective area is larger than on a video CCD and therefore depth of field is more easily achieved.

    If you want your image to have good depth of field there are ways to cheat this in video. One is simple, cheap and easy. The other is simple, expensive and complicated.

    Quick, cheap and easy: Move your camera back and away from your subject, zoom the lens in and focus on the subject. This changes the framing and thereby gives the effect of blurring the background. It doesn't always work well, and it's not for every situation, but when it works it's very effective.

    This has two effects:

    1) It changes the composition of the photograph so that the picture may show something in the foreground that isn't there in the previous shot.

    2) It appears to show that the background (and foreground object) are less sharp and more blurry than the subject of the photo. This is the shallow depth of field. In reality the depth of field is the same (all things being equal) it's just that it appears to be out of focus because of the way the perspective has changed.

    Quick, expensive and complicated.

    Use a 35MM adaptor. A 35MM adaptor is something put on front of your camera to fool it into thinking it is film rather than video. These adaptors are expensive, sometimes unwieldy and often produce upside-down images that need to be flipped in your editor.

    Don't go thinking that a 35MM adaptor is not for your cheap video camera. They can be bought (or rented) for quite a few consumer camera's now.

    Now's here the kicker. The rig attached to a cheap video camera costs well over the price of the camera itself. Some are cheaper, others are more expensive, but they are all extra bits that you need to carry around to get your picture looking 'filmic'. Oh, and they also reduce the actual amount of light reaching the camera's ccd chip so you'l need more light on your scene.

    With a rig like this you can get good, shallow depth of field by using 35mm lenses in place of the 'not so excellent' one attached to your camcorder.

    Use 24fps

    Film is a medium which exposes an image to your eye 24 times per second. Your brain fills in the gaps and makes smooth motion of what you see.

    For UK based folks have you ever wondered why news footage from the US looks 'different' to news footage from here? One reason is the different colour system they use (PAL vs NTSC), but another is the different frame rates

    Video - being electronic based - is constrained quite a lot by the frequency at which the circuits are being used. This means that UK based video's take 25 frames per second (FPS) and US based video's take 29.97 frames per second (don't ask!).

    The resulting image is very much different. Movement is sharp and 'strobe like' and your brain interprets it differently.

    However there are cameras on the market now that have a 24 frame-per-second ability. These are the ones that need to be used for getting the film look from video. Actually UK users can stick with 25fps because the 4% difference is almost unnoticeable.

    And make sure, if at all possible, that you capture this non-interlaced. Basically the general rule is 'if you can capture it non-interlaced (or progressive) it will make your footage look better.

    Summary

    Note that at no point have I talked about manipulating your footage in an editor, nor have I talked about esoteric items such dynamic range and colour spaces. These are all technical items that deal with how the image is processed when it comes out of your camera. All I've covered so far is how to focus on key items to get the film look from video.

    It doesn't matter what you do with your footage once it hits the editing table (whether you use free editing software or converters from one format to another) it will still look like video if it is badly framed, badly lit and has deep focus.


    Gary Comerford runs the Free video editing website at http://www.free-video-editing.com/ez

    The site has links to and reviews of Linux, Mac and PC software devoted to video editing, special effects, video conversion and DVD creation, as well as tutorials and other editing related items. It's also the place to find out all about the tools mentioned in this article.

    Why not subscribe to the ezine http://www.free-video-editing.com/eza to be kept up to date in this fast moving area of software?